Sunday, 3 February 2013

Chapter Seven

Couching the yarn to the background - Chapter 7 Module 2 page 103

Strips of sari ribbon have been couched to black felt using zigzag stitch in various lengths and widths.  I have used an orange thread in the needle with a yellow in the bobbin, altering the tension to pull the bobbin thread to surface to create more interest. 


Ideas to try, 'presser foot on'.  Chapter 7 Module 2 page 104

I have used sari ribbon and thick wool which has been knotted and twisted as it has been stitched onto the black felt.  Automatic patterns have used to couch the ribbon. 


I have used twine, cord, raffia and wool yarn in this experiment.  The orange woolly circles have been stitched with presser foot off as has the raffia and cord.  The twine has been stitched with an automatic pattern as has the red sari ribbon.


In the style of Bridget Riley - Chapter 7 Module 2 page 105

This has been couched using free embroidery with a small zigzag stitch onto calico.  I used a long length of synthetic cord, not sure what it is usually used for but it was lovely and smooth and easy to manipulate as I stitched.  I think I have achieved a fair representation of the optical illusion as in the Bridget Riley's work.  I think it is better than the piece I stitched in the previous chapter. 

In the style of Bridge Riley 

Layers and stitch - Chapter 7 Module 2 page 106

I have used mainly orangey/ochre and red sari ribbon which has been couched layer on layer using a variety of automatic patterns with presser foot on.  The ends of the ribbons have been left at various lengths.  Other embellishments such as beads or buttons could be added to create more interest.  It looks a bit boring as it is.

Layers and Stitch

Ideas to try with free embroidery
Bits and Bobs - Chapter 7 Module 2 page 107

Having found the image I wanted to work with it was great fun trying to get all the colours and different yarns together. 

Summer Garden
The work below has been stitched onto a transfer painted background using green and violet paint, although the background fabric has been completly covered in couched yarn so you can't see it.  The stabiliser is white felt

The main yarns used are sari ribbon and wool.  The sari ribbon was a bit frayed and tatty which I think adds to the texture, although it was a bit tricky to couch as it got caught up in the needle frequently.  Likewise the woolly yarn, but somehow it helped with the shaping and filling in.

The stitches used were chiefly fly stitch and whip stitch using a variety of colours.  The threads used were generally Madeira 30 both in the bobbin and needle.  Cable stitch using thick embroidery thread and wool has been used to give an impression of flower stems and the alium heads.  I like the way the cable stitch has pushed out the woolly yarn in the alium flowers creating a fluffy texture. 

The hardest thing about stitching was to try to remember not to create the flowers as they are but to give an impression of texture and colour.

Stitched work using 'bits and bobs'

Using your design source to inspire texture - Chapter 7 Module 2 page 109

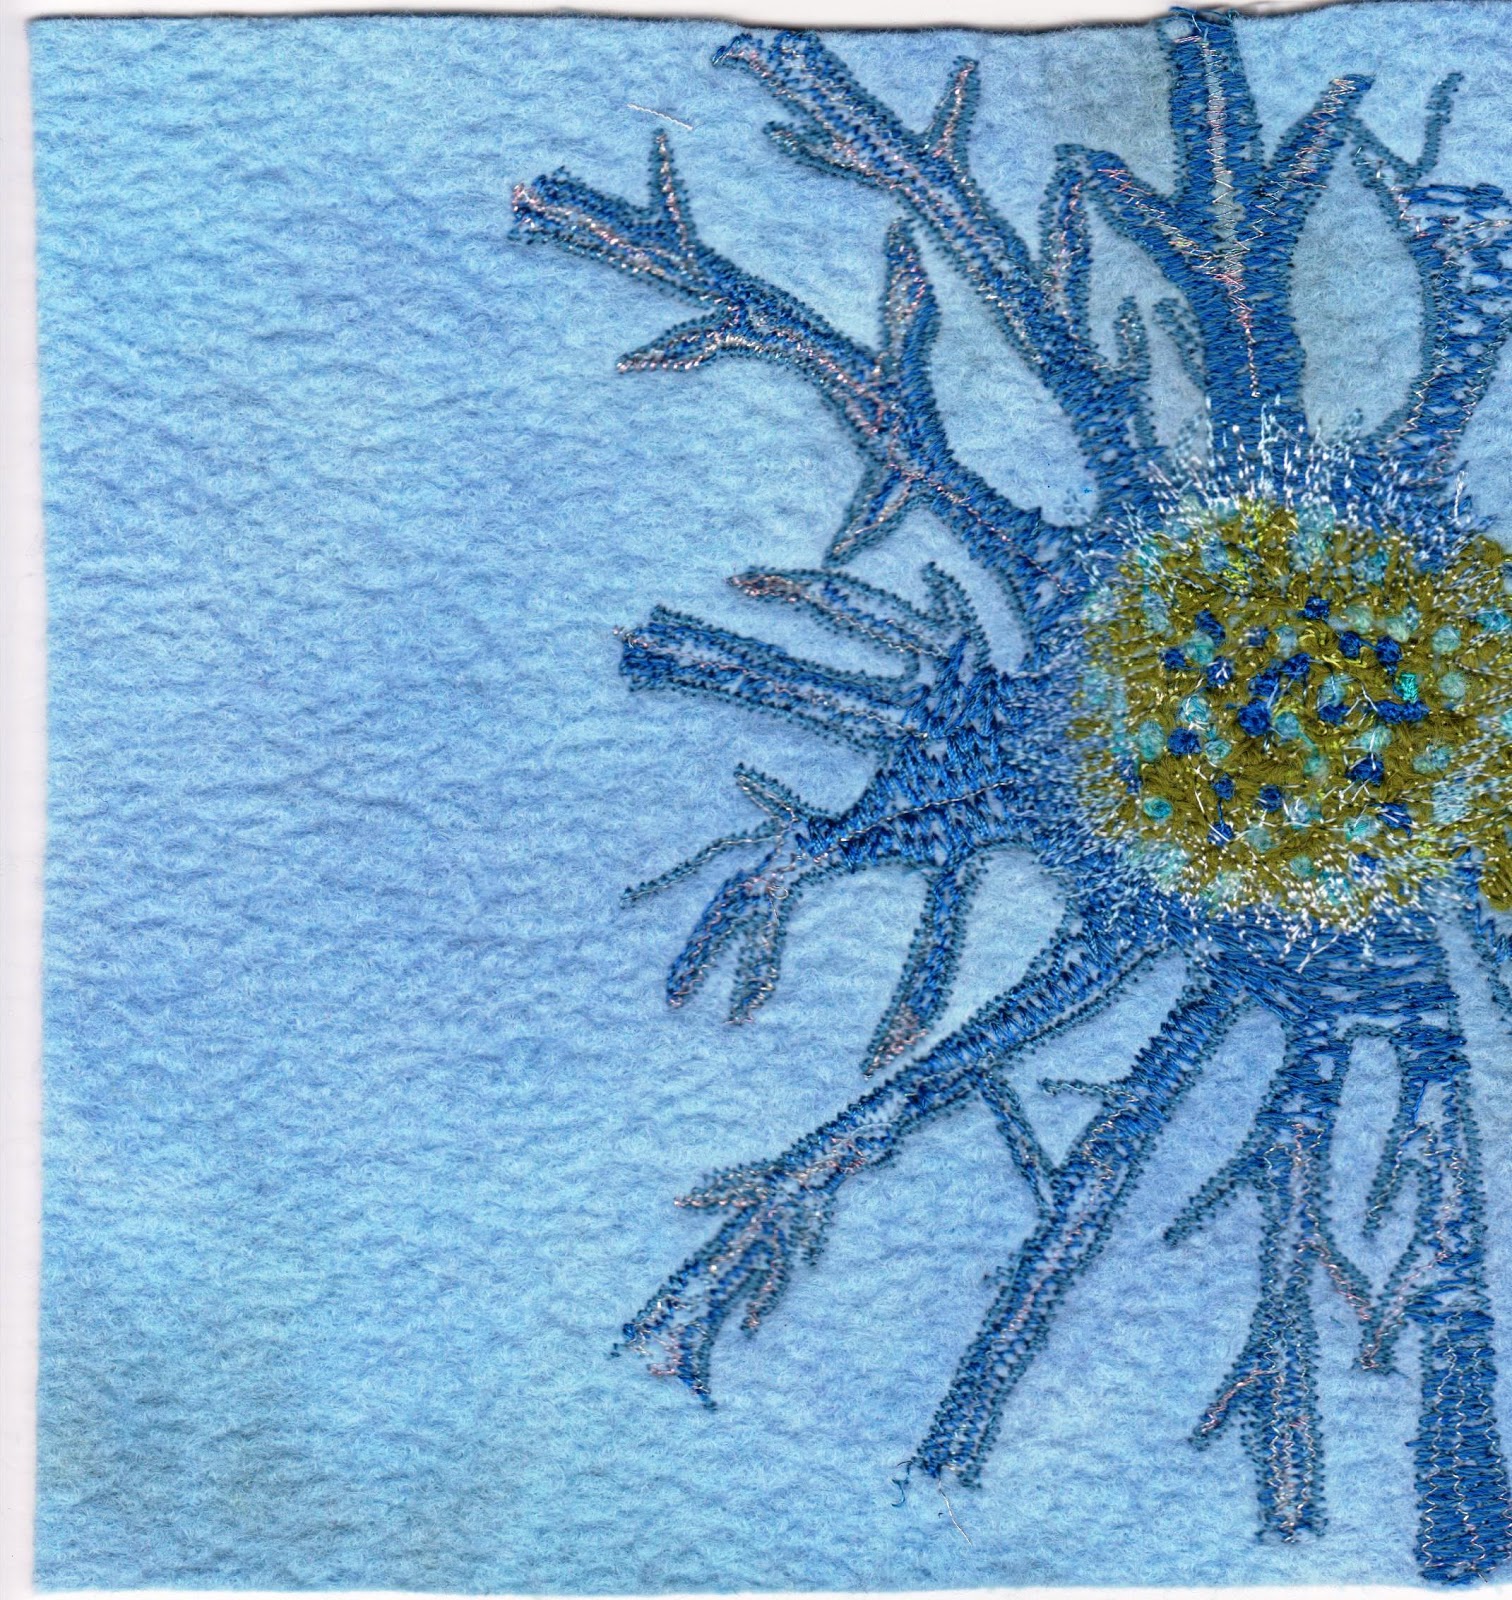
Here is my design source with stitching and evaluation below.


Picture to Inspire


Drawing of above picture

Stitched Eryngym from drawing on blue felt
 
Below is my evaluation of my work on "Using your design source to inspire texture".  Janet, I have used your layout as in Chapter 7 of  Module 2, as it seems a very clear way of going about it.  I hope you can read it and that it makes sense.  Can't find a way of transfering word docs. onto the blog site so I have had to print the table and then scan it onto my computer. 


Saturday, 3 November 2012

Chapter Six Module Two


Texture
This has been a lot of hard work and included a huge amount of stitching.  I would have liked to have completed and shown more examples of use of stitching but have found it difficult to get myself sat at my machine.  I think I have been worried about the final piece of stitching and working out how I was going to achieve a good result.  Having said that I am very pleased with how it has turned out.
 
I have been very brave and joined my local branch of the Embroiderer's Guild (having joined the main Guild last year).   I thought I should go to the local branch and at least have some contact with other people who embroider.  I appear to be the only person who is not a hand embroiderer, so the practical sessions are a bit daunting!  We have been asked to make a Christmas tree decoration for the Christmas Tree Festival at a Salisbury church.  I haven't completed mine yet, but have stitched a small silver star in metallic silver ribbon (cable stitch - and yes it does look quite delicate for cable stitch).  I shall applique this onto some red silk and stitch it all up with a red tassel and gold beads.  So below is the work that has taken me three months to do - sorry!
 
Texture Resources (page 87 of Module 2)
Here are a few images of textural pictures, there are many more but could spend all day putting these on the blog.  I particularly like the bark images, the dried sunflowers and the rose.  I have added words to describe their texture on the pictures themselves.


papery, flaky, peeling, bovine, smooth, antler and metallic
 
rough, ancient, craggy, dry, succulent, smooth, rubbery, round, knobbly
 
 
papery, tissue like, scented, soft, delicate, feathery, spiky, tough
 
rubbery, elegant, rough, bull dog teeth, octopus, tendrils and sharp


rough, dry, pliable, lacy, fluffy and springy


dry, papery, crispy, crumbly, smooth,
 
 
Bridget Riley and Visual Texture (page 91 of Module 2)
 
Attempting to create an illusion of a 3D image was a lot more difficult than I expected.  I did understand the principals and the need to plan and therefore stitch carefully in order to achieve the effect.  However, after 2 attempts I wasn't very good at it, although I could see that after the second attempt I had got a little closer. I fully intended to have a third attempt after finishing this chapter but had lost the motivation.
Image of Bridget Riley's 'Current' 1964
First attempt at creating a 3D image
 
A second attempt at recreating 3D image with black thread and white felt, using Bridget Riley's 'Current' (1964) as a resource.
 
Experiments with Stitching Textures (page 92 of Module 2)
 
Below are some examples:
Autumn leaves first example stitched on orange felt using variegated colours, orange, gold, brown and green.  Free machine embroidery using overstitched layers of zig zag in different lengths and widths of stitch.  The second sample uses the same colours as the first but using overstitched layers of granite stitch in variety of sizing. 
 
A Cactus - taken from a picture from my resource gallery.  It is a smooth cactus so I used free machine embroidery and cable stitch.  Calico with same for stabiliser.  A more prickly cactus would require different stitching possibly feather stitch or just draw the prickle and machine straight stitch over.


Alium flower head - stitched on black felt.  Free machine embroidery using purple and pinks with metallic thread in the bobbin.  The needle thread tension was tightened in order to bring up some of the metallic thread in the bobbin case.  I used straight stitch sewn in many individual star shapes, just using the needle as a pencil and drawing over the black felt.


Mark Making to Create Visual Texture (page 93 of Module 2)
Although I tried to work quickly without thinking it was a little tricky, particularly trying to capture the shape of smell of a red rose!  Results below!
 
These two images are of a cacoon of vine leaves and scrunching through frost.  All make with black charcoal.  The scrunch of the frost is made with a bottle cleaning brush.
 
 
The marks were made with black charcoal and stitched on calico with the same for a stabiliser.  Using free embroidery I stitched zig zag vermicelli with a black metallic thread, and then overstitched with an automatic pattern vermicelli style.  The central red square was overstiched in red and an automatic pattern.  I thought of the red square at the last minute and represents a trapped person.
 
 
Using black charcoal to make the marks, I stitched the shapes onto a piece of deep pink felt (white felt for stabiliser) using a thick silky piece of thread, in cable stitch.  I hoped to capture the idea of scent by using swirls of stitches.
 
 
To make the marks I used a black charcoal pencil on cartridge paper.  The stitching is on white felt using the same as a stabiliser.  I used free embroidery beginning with a green whip stitch to create a feeling of coolness and flow of air.  For some reason I used a purple zig zag vermicelli over the green stitching, though I don't know why, because it hasn't added anything to it.
 
Creating Texture with Paper and Glue (page 93 of Module 2)
I took this picture of tree bark at Savernack Forest near Marlborough Wiltshire on a very wet Wednesday morning and used this as a source for creating texture with fabric and stitch.
 

Original photo of tree bark (my own photo)

 
The image below shows how I built up layers of tissue with PVA to try to mould. the tissue to represent the photograph of bark.  I found the tissue difficult to mould as it kept breaking up and dissolving into nothing.  The size of the tissue model is A4.


Original photo of tree bark with tissue model.

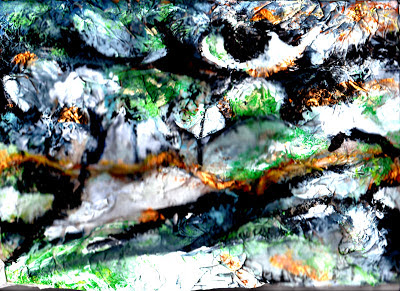
After drying out the tissue was then painted with acrylic paint.  I began to realise that the A4 size would be too large to stitch so decided to take a scan of the model and reduce it to A5. 
Painted tissue


scanned image of tissue model reduced to A5 size with altered colour contrast.


Creating Texture with fabrics and Stitch (page 95 of module 2)

Selection of threads I have finally chosen.  They mainly consist of crewel embroidery wool with some embroidery silk and cotton.  I have found crewel embroidery thread very satisfying to work with.
 Stitching Texture on the base fabric (page 97 of module 2) and Stitching High Relief areas (page 99 of module 2).
I tacked an area the size of the scanned A5 image that I have worked from onto a piece of black felt.  Using stitch and tear I traced around some of the shapes on the scanned image.  As I had planned to use cable stitch and free embroidery I marked these areas from the back of the felt with a white thread.

 Base piece of felt with low relief areas stitched in cable stitch, the white stitching marking the outline of the high relief areas can be seen also.  Finished piece of work below.


Finished piece of work.  I began to realise that I still had too large an area to stitch so decided to limit the high relief pieces to six pieces of stitched black felt.  These were stitched on over the marked areas by hand.  The stitches used were chiefly cable stitch using free machine embroidery with straight stitch and some zig zag.  I also used some cable stitched granite stitch continuing to use thicker thread in the bobbin, with some conventional granite stitch on top using a 40 thread thickness.  I decided against using Kunin felt and a heat gun until I had experimented more and felt confident I wasn't going to burn away all my hard work. 
 
Although this chapter has been hard work in all sorts of ways, I am very pleased with how it has turned out.  When I first thought about it all I thought I was going to create a very natural looking representation of the bark and collected threads of a naturalistic colour.  In the event it has turned out very different to how I envisaged, maybe David Hockney has had a slight influence.

Tuesday, 7 August 2012

Have had to tear myself away from the TV and the Olympics to put Chapter Five on the blog. Have been absolutely addicted to it all. The TV has been burning away almost 24 hours a day and not much sewing has been going on! Luckily I had completed most of the tassel before the sport began but have been very lazy in gathering everything up together etc. Wish we had applied for tickets now especially the cycling - amazing!

As I was going to be a couch potato for a couple of weeks, went out and about to some gardens and the village flower show. Managed to take yet another photo of an urn, (I think I'm turning into an urn nerd) and a beautiful dahlia which won a prize at the flower show (not mine I hasten to add).The thing with urns is that they are always just in the right place and beautifully composed.


Majestic Urn -Taken at Hinton Ampner. The thistles will look great when they come out and red brick walls are always lovely. I like the silvery tone of the urn and thistles contrasted against the red of the brick wall.


Textured Tassel
Page 72 of Module 2

I chose this image from my stash of pictures as it reminds me of Grinling Gibbons style of work and is an image I had hoped to use at some time and will probably use again.  I love the way the flowers begin to emerge and cascade from the enfolding leaves (don't know what these are called).  It seems voluptuous and graceful at the same time.  The dew drops on the ends of the petals/leaves are beautiful.


This is my chosen image for creating a textured tassel


Creating the tassel top shape
Page 74 of Module 2


Drawing from original image. 

Different shapes taken from the full drawing of my chosen image.  I decided to work with the piece that has a cross on it as my chosen shape.  This is a piece taken from the shape of the full flower in the original picture and initial drawing. I tried the second drawing along but this did not work very well.


Final five sided drawing for mock up using the chosen shape above.


Mock up of the tassel
Page 78 of Module 2

After putting together just three shapes to the tassel top, I decided that it was not wide enough so opted for a five shaped piece.


Three shaped mock up

 
Five shaped mock up with skirt.  The top is now wider at the bottom


Complete final mock up


Experiment
Page 80 of Module 2

These are the experimental automatic patterns and threads which I practised with.


Stitching the tassel top
Page 82 of Module 2

The cable stitching in these shapes incorporates my favourite automatic patterns from the practise piece above.  I began with finer thread in the bobbin layering thicker bobbin thread as I progressed to add texture to the shapes.  I chose a similar top thread colours in case the underside of the tassel top was on view at any time.


Three out of five stitched shapes for my tassel top


Reverse side of the stitched tassel shapes .


Putting the tassel together
The skirt
Page 84 of Module 2


A machined cord and paper beads that I made from Val Campbell Harding's ' Edges and Finishes'  There are so many wonderful ideas in this book.


Some cable stitched sari silk for the skirt


Completed Tassel
Page 85 of Module


I have tried to scan the image as best as I could and have taken photos as well.  I couldn't scan the whole of the tassel so have taken scans of various bits.  I think the skirt should have been filled out more.  Having done a five sided tassel top there is room for more filling out from the skirt.  The reason I didn't do more of the skirt was because I thought I didn't want too much and thought it would be more elegant with less, but I can see it needs more and elegance doesn't equate with lusciousness.   It would have been a good idea to have made some more beads and machined some thicker cord but I was concerned the beads would not thread through a thick cord.  However, I loved making the beads and the cord.  On reflection I have been very conservative with the tassel skirt and can see now how I could have incorporated so many other things e.g. shells and feathers and knots. (I see that in Val Campbell Harding's book 'Edges and Finishes' she recommends a book on knots.)  However, I do love my tassel top and it is everything I wanted it to be which is rich and voluptuous.  (I also forgot to sew some glass beads on to it to represent the dew drops!!! (Annoyed with myself).

This has been another really enjoyable chapter with so many ideas to carry forward and incorporate into other chapters.  I very much like going through the whole design process and discovering that one doesn't have to faithfully produce an image but that it acts as a springboard for a whole range of ideas and journeys onto different paths.