Strips of sari ribbon have been couched to black felt using zigzag stitch in various lengths and widths. I have used an orange thread in the needle with a yellow in the bobbin, altering the tension to pull the bobbin thread to surface to create more interest.

Ideas to try, 'presser foot on'. Chapter 7 Module 2 page 104
I have used sari ribbon and thick wool which has been knotted and twisted as it has been stitched onto the black felt. Automatic patterns have used to couch the ribbon.

I have used twine, cord, raffia and wool yarn in this experiment. The orange woolly circles have been stitched with presser foot off as has the raffia and cord. The twine has been stitched with an automatic pattern as has the red sari ribbon.
 |
In the style of Bridget Riley - Chapter 7 Module 2 page 105
This has been couched using free embroidery with a small zigzag stitch onto calico. I used a long length of synthetic cord, not sure what it is usually used for but it was lovely and smooth and easy to manipulate as I stitched. I think I have achieved a fair representation of the optical illusion as in the Bridget Riley's work. I think it is better than the piece I stitched in the previous chapter.
 |
| In the style of Bridge Riley |
Layers and stitch - Chapter 7 Module 2 page 106
I have used mainly orangey/ochre and red sari ribbon which has been couched layer on layer using a variety of automatic patterns with presser foot on. The ends of the ribbons have been left at various lengths. Other embellishments such as beads or buttons could be added to create more interest. It looks a bit boring as it is.
 |
| Layers and Stitch |
Ideas to try with free embroidery
Bits and Bobs - Chapter 7 Module 2 page 107
Having found the image I wanted to work with it was great fun trying to get all the colours and different yarns together.
 |
| Summer Garden |
The main yarns used are sari ribbon and wool. The sari ribbon was a bit frayed and tatty which I think adds to the texture, although it was a bit tricky to couch as it got caught up in the needle frequently. Likewise the woolly yarn, but somehow it helped with the shaping and filling in.
The stitches used were chiefly fly stitch and whip stitch using a variety of colours. The threads used were generally Madeira 30 both in the bobbin and needle. Cable stitch using thick embroidery thread and wool has been used to give an impression of flower stems and the alium heads. I like the way the cable stitch has pushed out the woolly yarn in the alium flowers creating a fluffy texture.
The hardest thing about stitching was to try to remember not to create the flowers as they are but to give an impression of texture and colour.
 |
| Stitched work using 'bits and bobs' |
Using your design source to inspire texture - Chapter 7 Module 2 page 109
Here is my design source with stitching and evaluation below.
 Picture to Inspire  Drawing of above picture 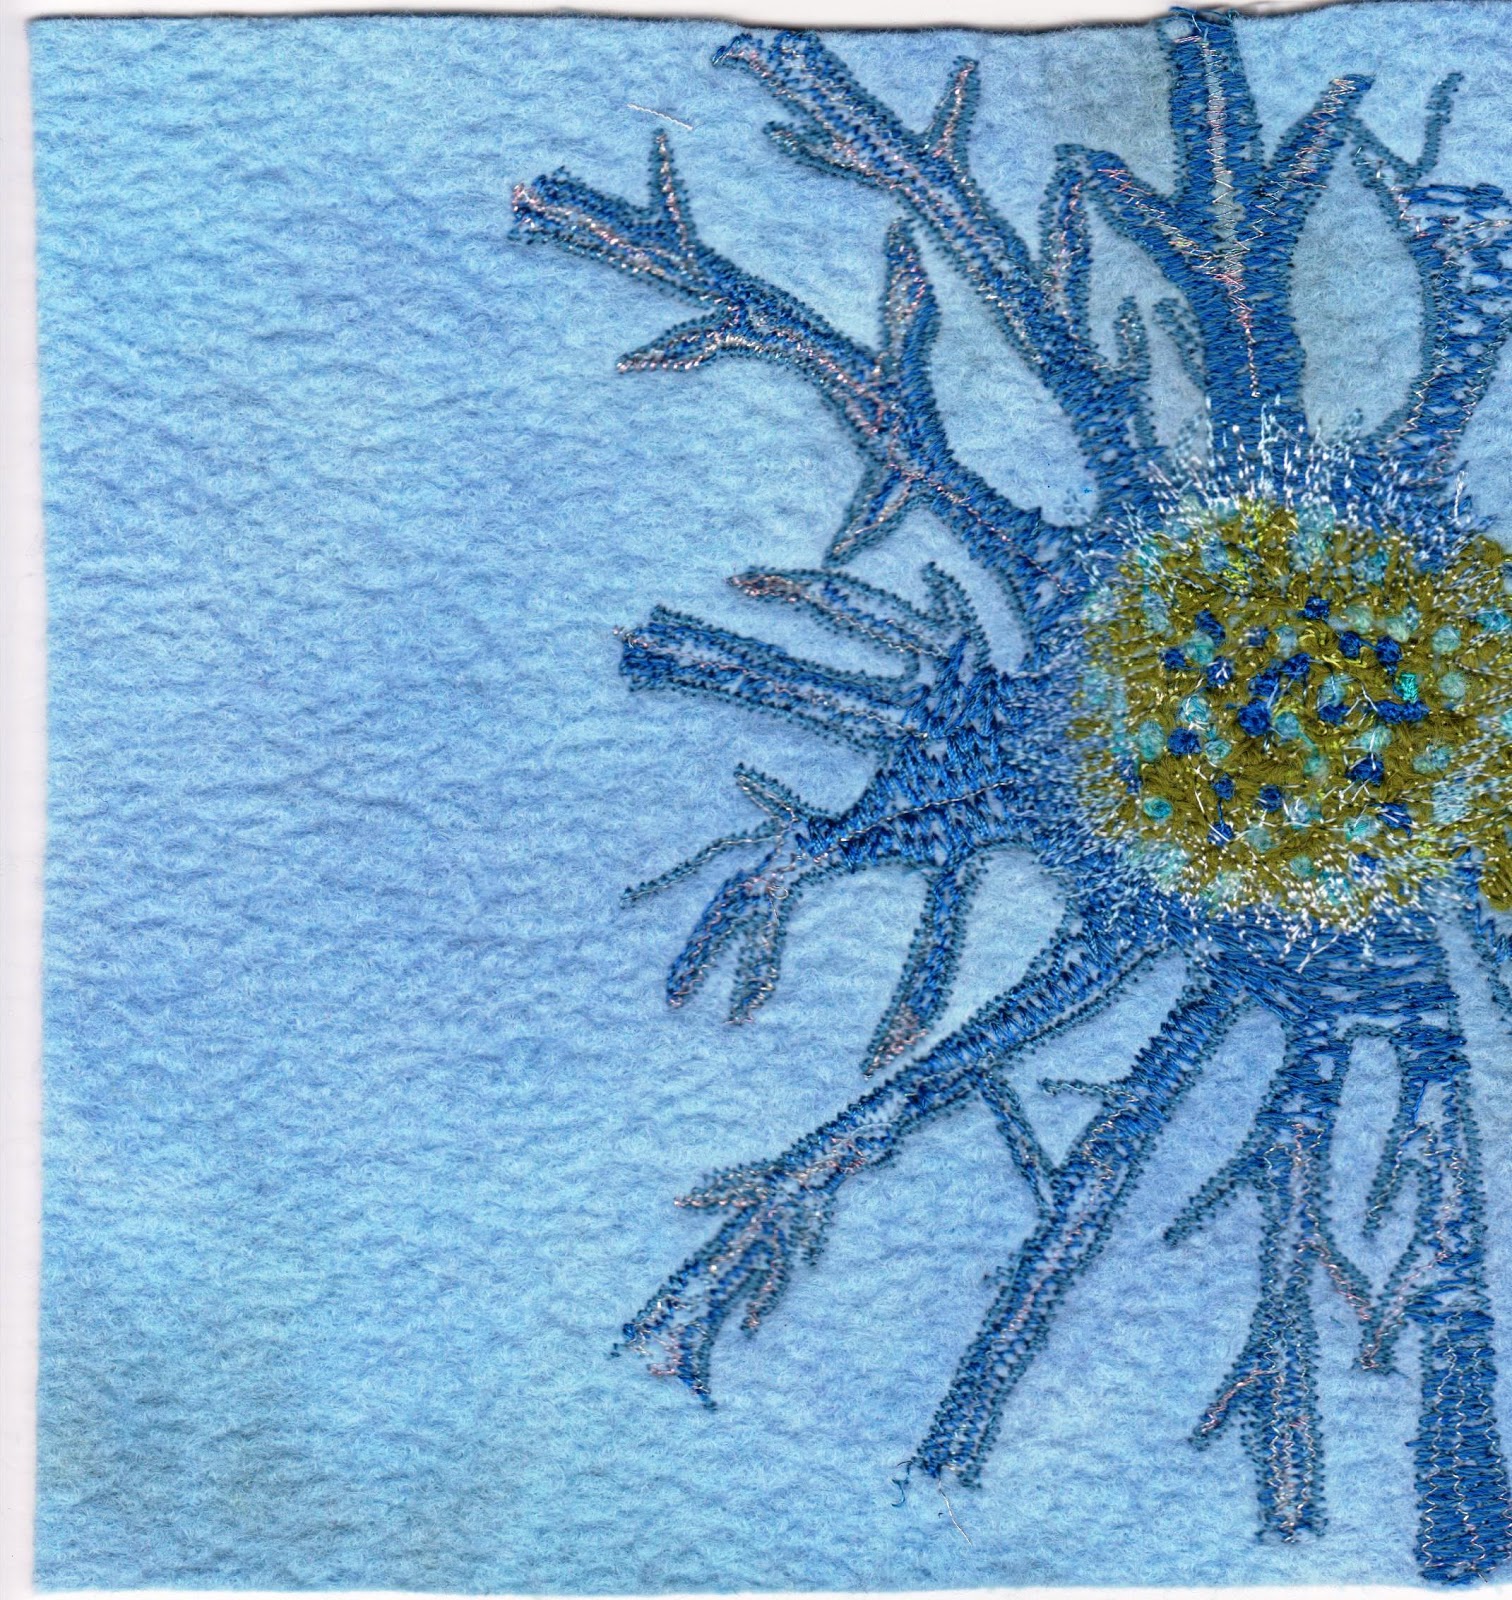 |
| Stitched Eryngym from drawing on blue felt |
Below is my evaluation of my work on "Using your design source to inspire texture". Janet, I have used your layout as in Chapter 7 of Module 2, as it seems a very clear way of going about it. I hope you can read it and that it makes sense. Can't find a way of transfering word docs. onto the blog site so I have had to print the table and then scan it onto my computer.


